Lots of things have happened since my last (and only) post. My mother-in-law passed away, I completed another term in my credential program (being a full time student is no joke..), and I have discovered another way to enable my addiction to treasure hunting through second hand stores and garage sales (that's a whole different post), much to my husband's dismay.
And to my garage's dismay, it's bursting with stuff that needs to be sold, put away, or given away... That garage is my future craft room, let's hope I can tame this addiction, otherwise I won't see it happen..
Anyway, after all this, I actually have a project to share with you all. As I mentioned earlier, my mother-in-law passed away in mid-February. One thing I remember about her was how much she loved to make things. She loved making different desserts, jewelry, crocheting (she made my kids the traditional blankets and clothes), and she loved wreaths. That's one thing I remember her always having on her door. So for her memorial service, I made her a wreath. And I enjoyed making it so much that I actually made it my goal to make one for our door. You don't know the chaos that is my life with a full time job, full time school work, AND babies, but you can imagine how hard it is to actually get the time to squeeze in some fun mommy crafting time.
BUT, when I say I will complete a project - I COMPLETE THE PROJECT. And here my friends, is the final result.
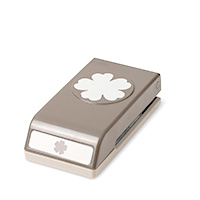
I found an awesome tutorial on Pinterest,(http://www.ourbestbites.com/2011/10/how-to-make-a-tulle-wreath-halloween-edition/) and decided to make one incorporating flowers using my Stampin' Up! spiral flower die, punches, ribbon, and paper.
Step 1: You will need tulle (I got mine at Hobby Lobby for 40% off, gotta love those coupons!), a wreath form (I used an 8 inch, I think), scissors, and time to tie and tie and tie knots..
Step 2: tie, tie, tie...................
I layered butterflies to give it some depth and texture:
And that was it! I hope you liked today's share... And don't worry, it won't take me another 3 months to come back and share with you, the next project is ready to go! If you don't know where to get the materials, don't fret, check out my online store.
Toodles!


Great start to blogging. Thanks for sharing.
ReplyDeleteFABULOUS - hope you will bring it for something to share on Saturday - so that we can admire your wonderful creation in person!
ReplyDeleteSimply beautiful! And to think that's the first thing people will see when they come to your door!
ReplyDeleteThank you ladies!! I'm excited being able to share it with you!!
ReplyDeleteWonderful blog! I wish I were creative as you! :-(
ReplyDeleteOh, but you are... that's the beauty of art, it can be anything you want... By what I read in your blog, you're just as creative as me :)
Delete